Software tools to get started...
Windows - Win32DiskImager
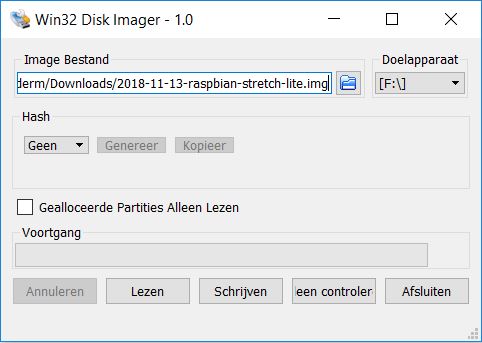
Win32DiskImager: This is a tool that allows to write a linux image (e.g. "2018-11-13-raspbian-stretch-lite.img") to a target SD card for use with dediacted hardware like the Raspberry Pi for instance. For this hardware, different ready to use images can be found online, e.g. Raspbian stretch lite. Note: This tool can also be used to create new images of an existing SD-card.
Windows - PuTTy
PuTTy: This is a SSH (Secure Shell) and telnet client, developed originally by Simon Tatham for the Windows platform. It allows to remotely interact with the linux system from the command line without any need for a graphical user interface. PuTTY can be downloaded here.
Activate SSH
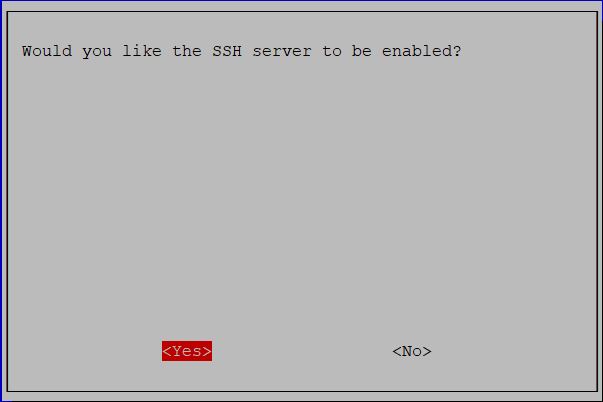
Prior to be able to use SSH, one has to enable it in the raspbian configuration. Hence, insert the SD card in the Raspberry Pi card slot. Connect a keyboard and screen and power the board. Once logged in, follow the following steps in order to activate SSH...
One can enter the configuration by the following command:
pi@raspberrypi $ sudo raspi-configNext this menu will be shown:


Now, close the menu and check the IP address of the Raspberry Pi on your LAN. Use the following command for that...
pi@raspberrypi $ sudo ifconfigThis will show you the IP address as well as your MAC adress of the ethernet adator in use. The IP address is required to log in into your Raspberry Pi via SSH. Optionally, the MAC address can be used to configure your router such that its DHCP server reserves a fixed IP address for this device such that you know were to find your device within your LAN. Now, you're ready to use SSH. Within PuTTy, select SSH, enter the IP address and press "Open".
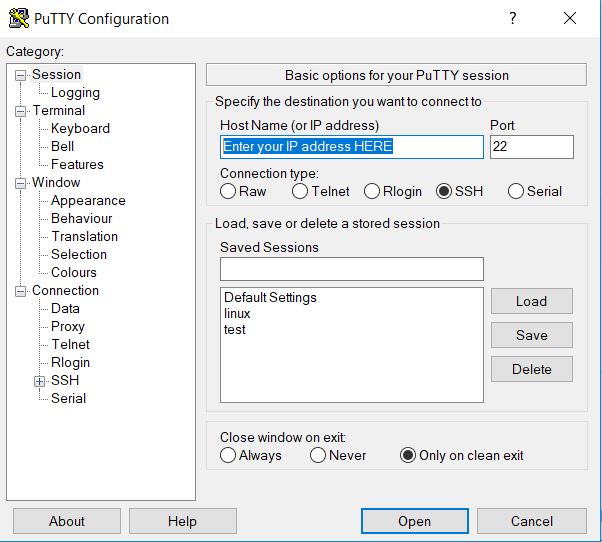
Instead of using its IP address , one could also address the Raspberry Pi by its so-called "hostname". Open the Rasbian configuration window as above -> network options -> hostname. Change it to something meaningfull for yourself and use that to address your Raspberry Pi in PuTTy.
Windows / Linux - python
Python: This is a multi-platform object oriented programming / scripting language with a large user group and a broad spectrum of available libraries. This makes it an attractive environment to develop the home domotics firmware. Its is recommended to make used to the latest python version unless you application requires libraries which are not yet available for that python version.
Check if python3 is already installed on the linux distro you are using...
Note: dpkg = Debian package manager | grep = "global regular expression print".
pi@raspberrypi $ dpkg --get-selections | grep python3For the Rasbian Strech Lite 4.14.79-v7+, this was the returned output:
libpython3-stdlib:armhf                         install
libpython3.5:armhf                              install
libpython3.5-minimal:armhf                      install
libpython3.5-stdlib:armhf                       install
python3                                         install
python3-apt                                     install
python3-chardet                                 install
python3-minimal                                 install
python3-pkg-resources                           install
python3-requests                                install
python3-six                                     install
python3-urllib3                                 install
python3.5                                       install
python3.5-minimal                               install
Hence, python 3 is installed but the package manager pip not yet. Let's install pip...
pi@raspberrypi $ sudo apt-get install python3-pip -yLinux - Samba file server
Samba file server: This is a service which can be installed on the linux machine to easily share files in a convienient way with a windows-based workstation which is used to develop the firmware. Hence, one can develop the software locally and then upload the firmware via a batchfile.
Samba file server installation
In order to install Samba execute the following commands with administrator rights:
pi@raspberrypi $  sudo apt update
pi@raspberrypi $  sudo apt install samba
Configure the samba service by editing the configuration file: "\etc\samba\smb.conf". Here you can set a.o. which folder you want to make public. Edit the following section in the configuration file according to your needs. In development phase it might be usefull to set the path to "/" (root) for gaining access from windows to all folders of the linux system...
[public]
	comment = Public Stuff
	path = ~PATH you want to make available to the windows machine, choose "/" for the root folder~
	public = yes
	writable = yes
To test the configuration file, one can execute the following command line command. This will give you an overview of the current configuration.
pi@raspberrypi $ sudo testparmPrior to use Samba, one also needs to add a user, this can be done as follows for the root user:
pi@raspberrypi $  sudo smbpasswd -a root	# enter password
pi@raspberrypi $  sudo pdbedit -L		# list all the Samba users
Now we can test the Samba server. First start the Samba service and find out the IP-address of the Raspberry Pi. "ifconfig" will give you all the required information if the ethernet adaptor.
pi@raspberrypi $  sudo smbd start
pi@raspberrypi $  sudo ifconfig
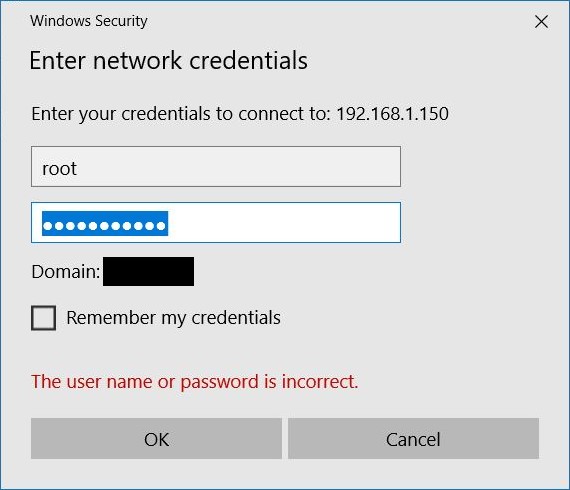
Next, enter "\\[Raspberry's IP-address]" on the Windows file explorer top bar. Now you should be prompted for login information: "root" | ~YourPassword~. Once logged in correctly, the [Public] folder should appear...
From the windows-based development PC, one can create a new folder on the linux system for hosting the firmware: python source code & webpages.
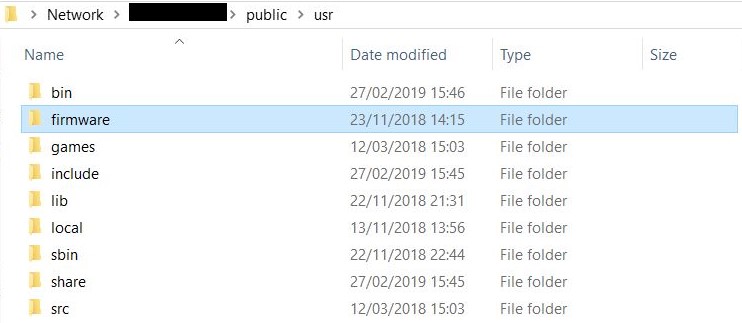
It is adviced to create the same "firmware" folder on the development PC which will be synchronized to the linux folder over Samba by means of an executable batch file with copy-instructions towards the Linux target device... An example of such a bat-file can be found hereunder:
E.g. "UploadFirmwareToLinuxTarget.bat":
SET targetip=192.168.1.xxx
SET windowspath=E:\FIRMWARE
SET linuxfirmwarepath=public\usr\firmware
SET linuxrootpath=public

rem copy the python files...
xcopy /y/e %windowspath%\python\*.py \\%targetip%\%linuxfirmwarepath%\python

rem copy the webpages...
xcopy /y/e %windowspath%\webpages\*.* \\%targetip%\%linuxfirmwarepath%\webpages
Windows / Linux - Apache2
Apache webserver: The Apache HTTP Server project is an effort to develop and maintain an open-source HTTP server for modern operating systems including UNIX and Windows. The goal is to use the webserver as a means to provide a user interface to the home domotics system.
Apache installation
Prior to install the Apache webserver, make sure that your linux machine (Raspberry Pi) is up to date. You will need administrator rights to execute the following commands.
pi@raspberrypi $  sudo apt-get update
pi@raspberrypi $  sudo apt-get upgrade
pi@raspberrypi $  sudo apt-get dist-upgrade
pi@raspberrypi $  sudo rpi-update
Next, install the apache server:
pi@raspberrypi $ sudo apt install apache2Edit the Apache configuration file to point to the directory where the webpages will be stored and modify the directory setting as follows:
...
<Directory "/usr/firmware/webpages" >
	Options Indexes FollowSymLinks Includes ExecCGI
	AddType text/html .html
	AddHandler server-parsed .html
	AddHandler cgi-script .py
	Require all granted
</Directory>
...
Start the Apache2 server:
pi@raspberrypi $ sudo apachectl start
 PART 1: Software tools & Linux configuration


